How to Install Landscape Lighting: A Step-by-Step Guide for Homeowners
Learning how to install landscape lighting is one of the highest-value DIY projects you can take on for your home. For a few hundred dollars in materials and a single weekend, you can add safety, security, and curb appeal that pros commonly charge $2,000 to $4,500 to deliver. The good news is that almost all modern landscape lighting runs on low voltage, which makes the work genuinely beginner-friendly.
A low-voltage system operates on 12 volts instead of the 120 volts running through your walls, so the risk of serious shock is minimal and you don’t need a permit in most municipalities. The work comes down to placing fixtures, running a thin cable, and making a handful of simple connections. If you can operate a screwdriver and dig a shallow trench, you can do this.
This guide walks through the entire process, from planning and shopping to burying wire and aiming lights. Most of the specifics here assume a 12-volt transformer system from brands like Volt, Kichler, or Hampton Bay, but the principles apply to nearly any kit or individual-component setup.
Tools and Materials You’ll Need
Assemble everything before you start. Nothing derails a project faster than realizing at dusk that you’re missing a connector. Here’s what a typical install requires:
- Low-voltage transformer (sized to your total wattage, usually 100W to 300W)
- 12-gauge or 14-gauge low-voltage landscape cable
- Path lights, spotlights, well lights, or floodlights
- Wire connectors (dry, silicone-filled “gel” connectors are best)
- Shovel or trenching spade
- Wire strippers and cutters
- Screwdriver set
- Multimeter (optional but handy for troubleshooting)
- GFCI-protected outdoor outlet
Expect to spend roughly $300 to $800 for a mid-range setup covering a 50-foot front-yard bed, and more like $1,000 to $1,800 for a full backyard with trees, a patio, and path lighting. You can read a full cost breakdown in our guide to landscape lighting cost.
Planning Your Lighting Design
The most common reason DIY landscape lighting looks off isn’t bad wiring — it’s bad placement. Spend an hour planning before you buy anything.
Start by walking your property after dark with a flashlight and a partner. Shine the light where you think you’ll want fixtures and note what actually reads well. Three techniques cover most situations:
- Grazing: wash a wall or fence at a shallow angle to show off its texture.
- Uplighting: place a spotlight at the base of a tree or shrub and aim it up.
- Path lighting: line a walkway every 6 to 8 feet for safe passage and a welcoming rhythm.
Sketch your layout on paper and mark each fixture, then add up the total wattage. LED fixtures draw very little (often 3W to 8W each), which means a 150W transformer can comfortably run 15 to 25 lights. The rule of thumb is to stay at or below 80% of the transformer’s rated capacity — more on that in a moment.
How to Install Landscape Lighting Step by Step
Here’s the full install, in order. Budget a full day for a typical 10- to 15-fixture system, including planning time.
Step 1: Set Up the Transformer
Mount the transformer on the wall near an outdoor GFCI outlet, at least 12 inches off the ground so it stays out of standing water. Drive two screws into the wall (stucco or brick will need anchors or masonry screws). Most units plug into a standard outlet; some can be hardwired, but the plug-in route is easier and keeps you within code for a DIY job.
Do not plug it in yet. One of the most common beginner mistakes is energizing the system before the wiring is done.
Step 2: Lay Out Fixtures and Cable
Set each fixture in place according to your plan, but don’t secure anything to the ground yet. Run the main cable loosely along your planned route, leaving a coil of slack at each fixture location. Give yourself an extra 2 to 3 feet of cable at the transformer end so you have room to work.
For runs longer than about 100 feet, or if you’re pushing close to your transformer’s wattage limit, upgrade to 12-gauge cable. Thinner 16-gauge cable sags in voltage over distance and your far-end lights will glow dimmer than the ones near the transformer.
Step 3: Make the Wire Connections
Now connect each fixture to the main cable using a moisture-sealed connector. There are two main approaches:
- Clamp-on “pierce” connectors: no stripping required; they bite into the cable and lock on. Fast, but make sure they’re the waterproof variety.
- Wire-nut or gel-filled connectors: you strip a small section of the main cable and twist the fixture leads together, then fill with silicone gel and cap. Slightly more work, far more reliable.
For junction-box style fixtures, match polarity if the leads are marked (usually a smooth and a ribbed wire). For most low-voltage systems, polarity isn’t critical, but matching it keeps every fixture behaving identically.
Photo by Andy Lee via Pexels
Step 4: Bury the Cable
Bury the cable 3 to 6 inches deep. You don’t need to go deeper than that — low-voltage landscape wire carries no shock hazard and doesn’t need conduit. Use a flat spade to slice into the soil, wiggle the cable into the slit, and press it closed with your foot. In lawn areas, cut a clean sod line so the grass knits back together within a few weeks.
Leave each fixture’s connection point accessible until you’ve tested everything. Many pros leave the connectors just above grade and cover them with mulch, which makes swapping or troubleshooting a light much easier down the road.
Step 5: Test, Aim, and Adjust
Plug in the transformer and set the timer or photocell. Walk every fixture and check brightness. If the lights at the end of the line look dimmer, you’ve got voltage drop — shorten the run, use heavier cable, or add a second home run off a multi-tap transformer.
Aim spotlights by loosening the fixture head and adjusting after dark, not in daylight. Grazing angles and tree canopies look completely different at night. Finally, bury the last bit of slack, set your timer schedule, and tighten everything down.
Choosing the Right Transformer
The transformer is the heart of the system and the place budget systems fail. The golden rule is simple: total fixture wattage should never exceed 80% of the transformer’s capacity.
So if you have 15 fixtures at 8W each, that’s 120W. You’d want at least a 150W transformer (120W is exactly 80% of 150W), and a 200W unit would be even safer if you plan to add a light or two later. Undersized transformers overheat and fail early, and they’re the single biggest cause of “my lights worked for a month and then died.”
Look for a unit with a built-in photocell or timer, a stainless steel or powder-coated aluminum housing, and multiple voltage taps (12V, 13V, 14V, 15V) so you can compensate for voltage drop on long runs. For a deeper look at selection and wiring, see our guide to landscape lighting transformers.
Low-Voltage vs. Solar Lighting
You have three main choices for landscape lighting, and they serve different jobs:
| Feature | Low-Voltage (12V) | Solar | Line-Voltage (120V) |
| — | — | — |
| Brightness | High, consistent | Low, varies | Very high |
| Install complexity | Moderate | Easiest | Requires electrician |
| Upfront cost | $$ | $ | $$$ |
| Reliability | Excellent | Weather-dependent | Excellent |
| Best for | Trees, paths, walls | Accent/ambient | Security, big areas |
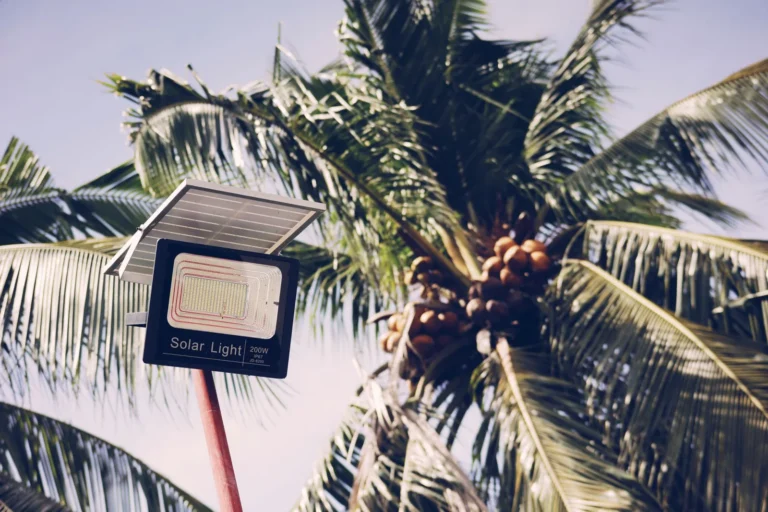
Low-voltage hits the sweet spot for most homeowners: bright enough to actually light a path or tree, reliable year-round, and safe enough to DIY. Solar is tempting because there’s no wiring, but output drops sharply in winter months and on cloudy days, especially at northern latitudes.
Line-voltage (120V) lighting is a different animal entirely — it requires an electrician, a permit, and buried conduit, which pushes cost well past low-voltage territory. If you’re weighing which route to take, our solar lights vs low-voltage comparison breaks down the trade-offs in detail.
Common Mistakes to Avoid
Even experienced DIYers hit these snags. Watch for them:
- Undersizing the transformer — the most frequent cause of early failure. Add 20% headroom.
- Using thin cable on long runs — voltage drop dims your furthest lights. Go 12-gauge past 100 feet.
- Burying connections before testing — always energize and inspect first, then bury.
- Placing lights too close together — “runway” lighting on paths looks Disney-fied. Space fixtures 6 to 8 feet apart.
- Skipping waterproof connectors — exposed copper corrodes within a season and the whole run flickers or dies.
Photo by Pexels via Pexels
Frequently Asked Questions
Is landscape lighting easy to install yourself?
Yes. Because most systems run on 12 volts, the work is safe and doesn’t require a permit in most areas. A first-time DIYer can typically install 10 to 15 fixtures in a single day using basic hand tools.
Do I need an electrician or a permit for landscape lighting?
For low-voltage systems, usually not. You only need an electrician and a permit when you’re adding line-voltage (120V) fixtures or a new outdoor circuit. Check with your local building department to be certain, but the standard plug-in transformer route is permit-free almost everywhere.
How deep should landscape lighting wire be buried?
Three to six inches deep. Low-voltage cable carries no shock risk, so code doesn’t require conduit or a deeper trench. In lawn areas, cutting a clean sod seam lets the grass heal over the wire within a few weeks.
How much does it cost to install landscape lighting?
DIY materials for a typical 10- to 15-fixture low-voltage system run roughly $500 to $1,500 depending on fixture quality. Professional installation typically adds $1,500 to $3,000 in labor. See our low-voltage lighting cost guide for a full breakdown.
For wiring and layout basics, This Old House covers installing landscape lighting.
The Bottom Line
Learning how to install landscape lighting is genuinely worth the effort. It’s one of the few home improvements that pays you back in three ways at once: better curb appeal, safer walkways, and a more secure property — all for a few hundred dollars and a weekend of work.
The system is forgiving. Low voltage means you can experiment with placement, correct mistakes cheaply, and expand the setup fixture by fixture as your budget allows. Start small with a properly sized transformer and waterproof connectors, and you’ll have a foundation you can build on for years.
If you’re ready to plan the aesthetic side of your project, start with our collection of backyard landscape lighting ideas for inspiration on placements and techniques that photograph well and light your yard beautifully.