Landscape Lighting Transformer: How to Choose and Size One Right
Every low voltage landscape lighting system runs through one small box you can hold in one hand: the transformer. It takes the 120 volts coming out of your garage or exterior outlet and steps it down to a safe 12 volts, which is what lets you bury thin, inexpensive wire just a few inches under your mulch and run path lights, uplights, and step lights without a permit or an electrician in most places.
The landscape lighting transformer is also where most DIY systems go wrong. Buy one too small and your fixtures run dim or flicker on the far end of the line. Buy one without the right taps or controls and you’ll be swapping it out before the first bulbs burn out. The good news is that sizing and choosing a transformer is simple once you understand three numbers: your total wattage, the voltage taps you need, and how much extra headroom to leave.
Here’s how to pick the right transformer the first time, what you can expect to pay, and how to install it so it lasts a decade or more.
What a Landscape Lighting Transformer Actually Does
A transformer doesn’t create power. It converts it, using two coils of wire wrapped around an iron core. Power flows into the primary coil at 120 volts, creates a magnetic field, and induces a lower voltage in the secondary coil — usually 12 volts in residential landscape systems, though some European and specialty setups run 24 volts.
That 12-volt output is the entire point. Low voltage wiring is dramatically safer to work with than line voltage, which is why building codes treat the two completely differently. A 120-volt line needs deep burial, conduit, GFCI protection, and often a permit. A 12-volt line can sit in a shallow trench or under bark mulch, and the worst a damaged cable will do is trip the transformer’s breaker rather than shock someone or spark a fire.
The transformer also acts as the system’s control center. Most units include a timer or photocell, a manual override switch, and the circuit protection that keeps a short in one fixture from frying the whole run. When people talk about “the power supply” of a lighting system, this is the part they mean, and it’s the single component most worth buying well.
How to Size a Landscape Lighting Transformer
Sizing is a two-step math problem, and it’s the step beginners get wrong most often. Get this right and your system will work on night one.
Step 1: Add up your total wattage
List every fixture you plan to install and its wattage. Modern LED path lights draw 3 to 5 watts each. Larger floodlights, well lights, and uplights run 5 to 10 watts each, and high-output spotlights on mature trees can pull 12 to 20 watts. A typical front-yard system with eight path lights at 4 watts and two uplights at 7 watts comes to 46 watts total.
Don’t go by bulb wattage ratings if you’re retrofitting halogens. A halogen system rated at 20 watts per fixture is actually pulling close to that, while an LED fixture is usually labeled with its true draw. Match the label to the label.
Step 2: Add headroom
Transformers should not run flat out. Industry practice is to load a transformer to no more than 80 percent of its capacity, and many pros recommend 60 to 70 percent so you have room to add fixtures later. Take your total wattage and multiply by 1.25, then round up to the nearest available size.
Using the 46-watt example, 46 × 1.25 is 57.5 watts — a 60-watt transformer would technically work but leave almost nothing for expansion. A 100-watt or 150-watt unit is the smarter buy, and the price difference is usually under $30.
| Feature | 100-Watt Unit | 150-Watt Unit | 300-Watt Unit |
|---|---|---|---|
| Best for | 5–10 LEDs | 10–20 LEDs | 20–40 LEDs |
| Typical load | 60–80W | 90–120W | 180–240W |
| Price range | $40–$90 | $60–$120 | $120–$300 |
| Taps usually included | 1–2 | 2–3 | Multi-tap |
| Expandable to | Small yard | Medium yard | Large yard |
Photo by Mario Ame via Pexels
Why voltage drop changes the math
On a long wire run, the fixture farthest from the transformer gets fewer than 12 volts because resistance eats voltage as current travels. That’s why every transformer has a second number that matters as much as the watts: the voltage taps.
A multi-tap transformer offers outputs of 12, 13, 14, and sometimes 15 volts. You connect the far end of the run to a higher tap so it receives a true 12 volts after the drop, while the near end stays on 12. If your longest run exceeds 100 feet, buy a multi-tap unit or step up the wire gauge from 16/2 to 14/2 or 12/2. A single-tap transformer on a long run is the classic cause of “the last three lights are dim.”
Magnetic vs Electronic Transformers
There are two broad types, and they behave differently enough to matter.
Magnetic transformers use the traditional iron-core coil design. They’re heavier, run warm, and are extremely durable — the kind of unit that runs for 15 years without complaint. They also handle inductive loads better, which matters if you still run halogen lamps, and they’re the right choice for very large systems or long cable runs. Expect to pay $80 to $200.
Electronic transformers use solid-state switching to convert voltage. They’re lighter, smaller, and cheaper — often $30 to $90 — and they’re ideal for LED-only systems, which is most new installs. The trade-offs are a shorter typical lifespan (8 to 12 years), a mild hum some people notice, and a minimum-load requirement: most electronic transformers need a few watts of load to function correctly, so a single low-watt LED may flicker or fail to fire.
For a modern LED landscape system under 300 watts, an electronic transformer is generally the better value. For large estates, long runs, or any halogen remaining in the mix, go magnetic.
Key Features Worth Paying For
A bare-bones transformer is just a box with a switch. A few upgrades make a real difference for a modest price.
- Photocell or astronomical timer. A unit that turns on at dusk based on light level, or a timer that tracks sunrise and sunset, means you never touch it again. Basic mechanical timers drift and need seasonal resetting.
- Multi-tap output. As covered above, this is non-negotiable on runs longer than 100 feet.
- Weather-rated enclosure. NEMA 3R or stainless steel housings survive rain, snow, and UV better than painted steel, which rusts at the seams within a few seasons.
- Stainless or coated mounting hardware. Cheap screws rust fast outdoors, and a rattling transformer on its bracket is a nuisance you’ll fix every spring.
- Dimmable or smart control. Some higher-end units from brands like Volt and FX Luminaire tie into Wi-Fi dimmers and app control, which is nice but by no means required.
Photo by Connor Scott McManus via Pexels
How Much a Landscape Lighting Transformer Costs
Transformer prices are the smallest line item in most lighting budgets, which is exactly why it’s a mistake to cheap out here.
- Small single-tap units (60–150W): $25 to $90 at big-box retailers. Fine for a short path or a few garden lights.
- Mid-range multi-tap units (150–300W): $60 to $200. The sweet spot for most whole-yard systems.
- Large and commercial-grade units (300–600W): $150 to $500 for multi-tap models with heavy enclosures and full control options.
- Upgraded control modules (astronomical timers, smart dimmers, photocells) run another $30 to $100.
For a deeper price breakdown on the entire project, fixtures and wire included, see our low voltage lighting cost guide and the full landscape lighting cost overview.
Installation and Placement Tips
Where you mount the transformer matters almost as much as which one you buy.
Mount it close to your power source — typically an existing outdoor GFCI outlet or the exterior wall near your garage — but keep it off the ground. Most units are designed to hang from a bracket about 12 to 24 inches up, which keeps them out of standing water and running snowmelt. If you don’t have an outlet nearby, add a dedicated GFCI line; that’s the one part of the job worth hiring an electrician for.
Run a low voltage cable from the transformer’s output terminals into the yard, and keep the connections dry. Grease-filled wire nuts (or the newer clamp-style connectors that pierce the insulation) are the standard way to tie fixtures into the main run, and they’re the single most important place not to cut corners. Water is the enemy of every transformer and connector, and a failed connection is usually the reason a system goes dark within its first two years.
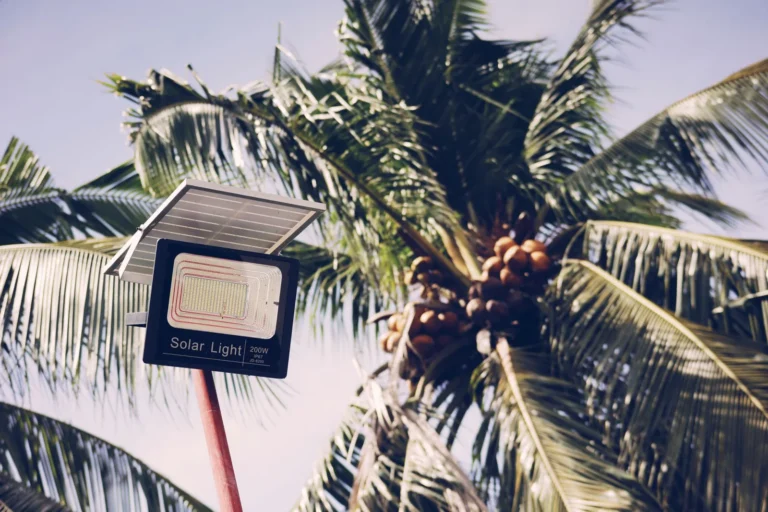
Finally, split the load cleverly. Many larger transformers have two separate output circuits, so you can put path lights on one and tree uplights on the other. If one circuit ever faults, the other keeps your walkway lit rather than leaving the whole yard dark. For ideas on how to lay out the fixtures themselves, browse our solar lights vs low voltage comparison and the backyard landscape lighting ideas guide.
Frequently Asked Questions
What size landscape lighting transformer do I need?
Add up the wattage of every fixture, multiply by 1.25 for headroom, and round up. A 10-light LED system drawing about 45 watts is best served by a 100- to 150-watt transformer. Oversizing is cheap and nearly always the right call, since it leaves room to add fixtures later.
Can I plug a landscape lighting transformer into a regular outlet?
Yes. Most transformers plug into a standard 120-volt GFCI outlet, which is one reason low voltage systems don’t require an electrician or a permit in most jurisdictions. Only the outlet itself, if you need a new one installed, requires a licensed electrician.
How long does a landscape lighting transformer last?
A magnetic transformer routinely lasts 15 years or more. Electronic transformers typically last 8 to 12 years. Mounting the unit out of standing water and shading it from direct afternoon sun both extend its life considerably.
Why are my landscape lights dim at the end of the run?
That’s almost always voltage drop, not a failing transformer. The farthest fixtures on a long cable run receive less than 12 volts. Fix it by moving those fixtures to a higher voltage tap on a multi-tap transformer, shortening the run, or stepping up to heavier-gauge wire.
Do I need a special transformer for LED landscape lights?
Not necessarily, but an electronic transformer is the natural match for an all-LED system. Just make sure the transformer’s minimum load requirement is below your actual draw — a single 3-watt LED can fall below the minimum on some larger units, causing flickering.
The Bottom Line
The landscape lighting transformer is the cheapest component of your system and the one most likely to cause aggravation if you buy wrong. Add up your fixture wattage, leave yourself 25 percent headroom, and spend a little extra for multi-tap output, a photocell or astronomical timer, and a weather-rated enclosure. Those three upgrades add maybe $50 to $100 and save you from a dim, flickering system two winters from now.
Buy the transformer well, connect it dry, and three-quarters of the problems people blame on their lighting hardware never happen. For step-by-step installation help, the walkthroughs at This Old House and Family Handyman cover the entire process from outlet to final fixture, and our path lighting ideas guide will help you decide what to light once the power is sorted.